For most art teachers, the first week of school is very, VERY tedious. Perhaps it is just me, but having to repeat the same thing five times a day for five days wears me out. By the third class, I can't remember who I told what and my excitable students matched by my tendency to ramble excitedly make it impossible for me to keep my pacing so everyone gets in and out of the art room on time. So here is my solution...
iMovie!!
That's right folks, I can cover the room tour as well as some procedures that we will practice in 5 minutes or less and I know every class is getting the same information.
Click on the link below and have a look for yourself!
I am not a professional movie maker, which is something my film-industry-husband was quick to point out, but it is quick and gets the job done! I love to see the students looking around the room to locate things seen in the video. They are excited by the "behind the scenes" elements such as the kiln room and storage closet!! They are mesmerized by my virtual wizardry and because the viewing is so quick, we have time to read a book, set up our Idea books, draw a first-day-self-portrait, and write an artist statement!!
How did I do it you ask...
I used an iPad. I like this tool because it limits my choices. Without those limitations I would spend days obsessing over transitions and audio. Any recording device will due and you can do this in Microsoft Movie Maker as well as many other programs, I'm sure, but this is how I did it with and iPad 2.
- First I walked around my room and took video and still pictures of everything I thought was important, the doors, special areas, bulletin boards and so on. I even took footage of the feet (haha-get it!) on which the classes are to stop and wait when they arrive. (The iPad let me jump up and take more footage as needed too because it automatically supplies the video to the app).
- Next, open iMovie and choose a style. This will give you a standard transition style (that is the way you transition from clip to clip, like fade in and out). Tap on the video and they will drop down into the movie track.
- Tap the track to get a yellow highlight so you can spit or shorten the clip. The boxes between the clips will show you the transition styles and if you leave it a - (minus sigh) you will have a hop between cuts. Kissing triangles will fade in and out, where the star will give you the themed style.
- Tap each clip to highlight and then touch audio. Turn the volume on each clip to 0. Now you won't have any background garble when you do the voice over.
- Now, find a quiet place so you can talk through your video. You are going to be watching the video as you speak so that makes it kind of easy. Just remember to your fun-teacher/announcer voice. The first time I did it, I didn't do that and my video could cure insomnia around the globe!!
- Once the audio is to your liking (this is the part for me that sometimes take the longest) you may need to go back and adjust some of the clips to hit your audio cues, make video clips a little longer or shorter or add more footage.
- Finally, I like to add a soundtrack. In Audio mode, select add a song and pick from your library or the stock stuff. Click on the audio tracks to highlight and then adjust the volume. I turn the voice up to 165 and the music down to 60 so that it is not distracting from the content. The music will get louder when there is not voiceover, the song will loop automatically and you can set up a fade at the end to end the clip.
- My video is not perfect. There are lots of things I would change, but I gave myself deadline and after an hour of editing, voicing-over and sound-track laying, the results suited my needs and I called it. I upload to the iMovie theater so I could play it from my desktop, but you can also send it to YouTube and put a link on your computer like I did here.
- Have fun and enjoy the process. If the movie is not done in time for the first day, do it the old fashion way, or just test it on your older peeps who have been with you longer.
Working with the iPad is great for me because I can just tap and tap and tap. It is all out there to find, no hidden drop-down menus. It's not as complicated as it may sound and it is a great teaching tool for that first week!
Have a great first week...whenever it starts!

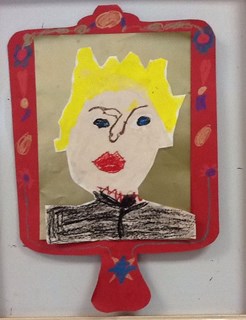


 Last week I spent two days with the Arts teachers in the Indianapolis Public School system for some summer PD before they headed back into the trenches for another year of growing people. They experienced a unit using the enduring theme of Identity and explored several student growth indicators, then discussed how to shift their teaching focus from studio to students. We grow people, that is what we do! They made a personal work of art and did a little planning. They talked, planned, problem solved, and collaborated. It was a personally inspiring experience to see the change in the room from 9:00AM Tuesday to 11:30AM Wednesday.


